This is the first in a possible series of Dummy to Dummy Guides. I use this term not because I think you or I are a dummies, but because for my part I don’t claim any expert backgrond, and for your part I assume no special knowledge of the topic at hand. The solution provided works for me, and I expect it will work for you, thats all I promise. I is quite possible there are smarter ways to solve the problem.
Today, I show you a way to "save" a flight in FlightGear and get a clickable shortcut to your desired flight. Using this method I find I can go from desktop to tarmac in 30-40 seconds.
A note to those still considering whether to install FG: if all this sounds too complicated, don't let it scare you away from FG. You can forget about this stuff and just to use the wizard, which is very easy to use, to set up your flights.
The approach is straightforward:
- When launched from the command line, FG uses the preferences.xml file in the FlightGear/data directory to determine setup for the flight. This file contains default settings.
- We're going to make a copy of this file, and hand edit it to create our desired starting conditions for a flight.
- We can do a switcheroo between our custom preferences and the default, and launch FG from the command line.
- We can create a batch file to do this automatically, and give us a double-click way to start our favorite flight.
- Repeat as necessary for each alternate scenario.
If you've never written a batch file before, don't worry. A batch file is basically a text file containing commands you could enter at a command prompt. You should be able to just cut and paste the text below into a text file (use simple text editor such as Wordpad, not Word), and then save the file with the .bat extension. When you double-click on it it will run the commands. You will only need to edit this text if your installation is not in the normal place, or you decide to name your custom file something different. Note that this script will make a backup copy of the default preferences before copying your custom one over, and then restore the original afterwards.
If you're not familiar with xml files, they are simply text files written in the xml format. An xml file doesn't do anything, it just presents information in a way that other applications can easily parse, while remaining human readable. You can edit the xml file in any standard text editor, but it will be a lot easier to get around large xml files if you use an xml-specific editor, such as Xmlpad (free! Google it if you want to try), as shown in the screenshot. This image demonstrates how you can navigate through sections on the left panel, and make edits on the right side.
As for the actual edits to the xml file, I will leave that to you to figure out. Most of the tags you will want to edit are self-explanatory. For the airplane, you will need to know the correct name the simulator uses for that plane. For starting airport, you will need to know its ICAO name. For these and some other values, you can check by calling up the wizard, making your selections, then checking the "show command line" option. Many of the options you set in the wizard can be turned on or off by using either "true" or "false" in the property value. Have fun experimenting with options. Just make sure you backup the original version before you start, and work with a file that you have saved a different name, such as my_preferences.xml (this is the name to use if you want to use my batch script as is).
I suggest you work on one custom file for a while until you get all the options the way you want them. Then, you can copy this for other versions for different options (plane, airport, etc). Create a separate batch file for each custom preferences file.
Here's my batch file (cut and paste between the -------'s):
-----------------------------------
SET FG_HOME=c:\Program Files\FlightGear
SET FG_ROOT=c:\Program Files\FlightGear\data
SET FG_SCENERY=C:\Program Files\FlightGear\data\Scenery;C:\Program Files\FlightGear\data\WorldScenery;
cd "c:\Program Files\FlightGear\data"
copy /Y preferences.xml bac_preferences.xml
REM edit the next line of you custom preferences file has a diffferent name
copy /Y my_preferences.xml preferences.xml
"c:\Program Files\FlightGear\bin\win32\fgfs.exe"
copy /Y bac_preferences.xml preferences.xml
pause
-----------------------------------
Drop me a comment if you try this and run into any trouble. Also, if you know of a more clever way to do this let me know.
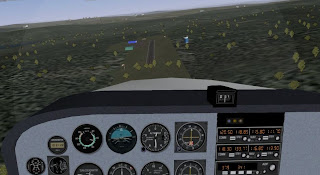
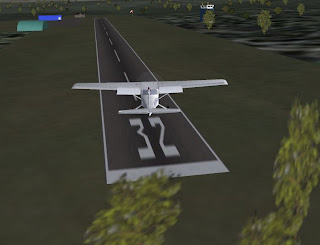
Finally, a few fun pictures. The first two show the trees I've added to 9B1, using the process described in the previous post. As I've mentioned before, this is true-to-life and keeps you on your toes when landing. FG trees can be flown through without harm, though. Another odd thing is that these trees are one sided and appear transparent from the "back". I ended up copying a bunch of them and specifying a rotation of 180 degrees.
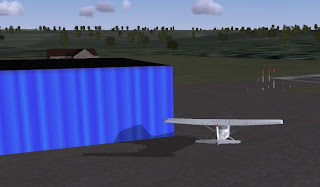
The last shot shows a neat effect that MSFS has not been able to accomplish: the airplane shadow correctly projects on scenery objects. I hope this doesn't go away with the next version of FG.


2 comments:
You can use the billboard-tree.xml for correct camera-oriented trees.
HJ.
Hi,
Thanks for posting your comments on FlightGear and helping to spread the word!
You might be interested in the various command-line options available. Most things that you can set from preferences.xml, you can also set from the command-line directly. Have a look at the following section from The FlightGear Manual:
http://www.flightgear.org/Docs/getstart/getstartch3.html#x8-230003.5
Hope this is of some use and hope to see you online some time!
-Stuart
Post a Comment